Good day everyone 👋
In this article i'm going to explain how to build a fully dynamic drop-down VueJS 3 component with HTML, Tailwind CSS 3 and Laravel 9. We will use composition API which was introduced in the latest version of Vue, our drop-down's content will be looping over Mysql database so it's a dynamic component and also we will introduce Vue3 click-outside npm package to close the drop-down when the user clicks anywhere else on the screen.
By the end of this 2 parts series you will be able to build this:
Table of Content:
- 0- What will You Learn?
- 0- Tools
- 1- Install Nodejs and npm
- 2- Start your Laravel Project
- 3- Install Database Management Tool
- 4- Create a Database
- 5- Connect to Database
- 6- Create fake users & Migrate with seed
- 7- Install Tailwind CSS
- 8- Install Vue and it's dependencies
- 9- Prepare your blade file
- 10- Enable Vue and make component
- 11- Build the Drop-down
- 12- Vue JS 3 click outside
- 13- Loop over users in Database
- 14- Finishing
By the end of this tutorial, you should know the below by heart ❤️:
- How to install Node and npm.
- How to create new Laravel 9 project.
- How to create and connect to a database.
- How to seed fake users to database.
- How to install tailwind CSS.
- How to install Vue, Vue Router and Vue Loader and activate them.
- How to prepare your blade file to receive your component via Vue-router
- How to make a dynamic drop-down vue js 3 component using composition API and click-outside package and style it with Tailwind CSS 3.
- How to receive Json data from database via route and loop over them with axios in Vue component.
A piece of advice before starting, this is a step by step guide so it's better if you code along as we will be using multiple frameworks and techniques. Let's get to it? 👇
0- I'm using
1- npm & Node
2- Laravel 9 🥳
3- Table plus
4- Tailwind CSS 3
5- Vue JS 3 (With Vue Router & Vue Loader)
6- Windows Terminal
7- VS Code
1- Install Nodejs and npm:
- First thing you need to make sure that you have Node and npm installed on your machine.
- You can check that by opening up the terminal and type those two commands:
npm -v
node -v
- If you need to install them 🔗 DOCs for downloading Node and npm
- If you got that converged, move on 👇
PS C:\Users\Moose> node -v
v16.13.2
PS C:\Users\Moose> npm -v
8.4.0
2- Start your Laravel Project:
- If you already have a project, you can skip this step 👇.
- I use composer to create Laravel projects.
- You can download composer from here: https://getcomposer.org/
- Open up your terminal and create your Laravel project in the desired directory.
- The below command will create new Laravel 9 project for us.
PS C:\Users\Moose> cd F:\Projects
PS F:\Projects> composer create-project laravel/laravel dropdown-component
3- Install Database Management Tool:
- I use free version of table plus to manage my databases.
- You can download it from here: https://tableplus.com/
- This really doesn't require any instructions, keep clicking next and leave everything to default settings.
- You don't have to use it if you prefer another database management tool.
4- Create a Database:
- I will use MySQL Database. You're free to use whatever database you like.
- There are many ways to create Mysql Database, to know more you can visit this link.
- I will create a database using MySQL Command Line Client and name it 'dropdown'.
mysql> create database dropdown;
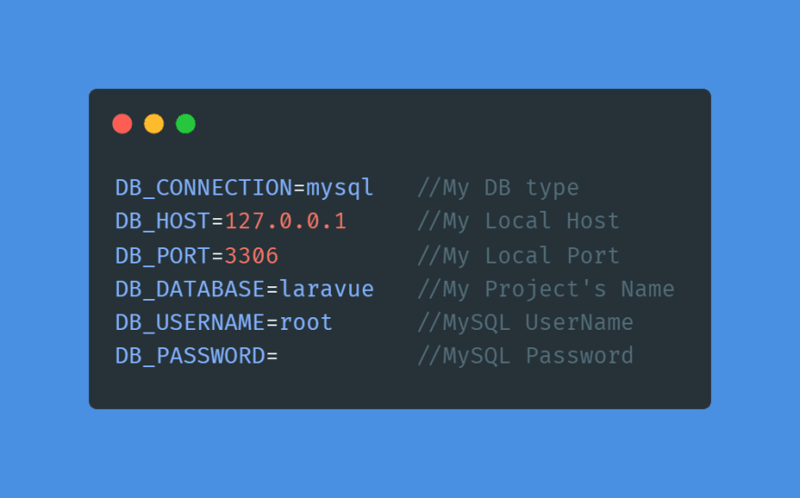
5- Connect to Database:
- Open your Laravel project in the preferred code editor, in my case I will use VS Code.
- Head to your
envfile in the main Laravel project directory. - In the below section make sure to update all the info to match your created database.
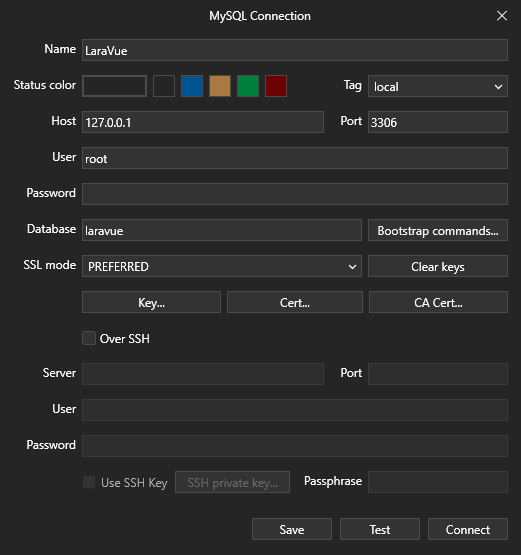
- Open table plus -> click on 'Create new connection' -> MySQL.
- Fill in the fields with the info you just created.
- You can name the connection with anything you want.
- After filling the fields click test then connect.
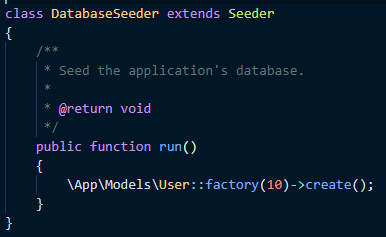
6- Create fake users & Migrate with seed:
- Head to
database\seeders\DatabaseSeeder.phpand remove the comment from the line inrun()function. - This will allow you to create 10 fake users with Laravel Factory.
- Open up the terminal in the main project directory to run your migration command and --seed the fake users to database.
PS F:\Projects\dropdown-component> php artisan migrate --seed
- You can test that everything is as expected to this point, head to
resources\views\welcome.blade.phpand clear it, - Create new HTML boilerplate and in the body write the below code.
<!DOCTYPE html>
<html lang="en">
<head>
    <meta charset="UTF-8">
    <meta http-equiv="X-UA-Compatible" content="IE=edge">
    <meta name="viewport" content="width=device-width, initial-scale=1.0">
    <title>dropdown</title>
</head>
<body>
    @foreach ($users as $user)
        <p>The name of the user is: {{ $user->name }}</p>
    @endforeach
</body>
</html>
- Open the terminal and hit the below code within the project main directory to serve and see your project in browser.
PS F:\Projects\dropdown-component> php artisan serve
- You should see now that Laravel is looping over the database User's table and giving us back the name for each user.
7- Install Tailwind CSS:
- If you would like to install Tailwind CLI you can visit my article for a step by step guide on how to do that 🔗 CLICK HERE
- Or you can simply add the following line of code to import tailwind CDN in your project by following the steps in the documentation HERE
- In my case, I will use tailwind CLI for better results.
8- Install Vue and it's dependencies:
- Open the terminal in your project's main directory and run the below code to install Vue, Vue Router and Vue Loader.
PS F:\Projects\dropdown-component> npm install vue@next vue-router@next vue-loader@next
- I also prefer running
npm run watchand leave it running in the backgroud while I'm working on my project.
PS F:\Projects\dropdown-component> npm run watch
- Head to
webpack.mix.jsfile in your project's main directory and.vue()right beforepostCss.
mix.js("resources/js/app.js", "public/js")
    .vue()
    .postCss("resources/css/app.css", "public/css", [require("tailwindcss")]);
9- Prepare your blade file:
- Head to the
welcome.blade.phpfile and clear the body then I will add empty divs that will contain our Vue component with router-vue. - Don't forget to add
id="app".
<body>
    <main class="max-w-6xl mx-auto mt-6 lg:mt-20 space-y-6"
                 id="app">

        <div class="max-w-xl mx-auto mt-10 text-center">
            <div class="space-y-2 lg:space-y-0 lg:space-x-4 mt-8"
                        id="app">
                <div class="relative lg:inline-flex items-center
                            bg-blue-100 rounded-xl">

                    <router-view />

                </div>
            </div>
        </div>

    </main>
</body>
10- Enable Vue and make component:
- Head to
resources\js\app.jsand add the below code and save to enable Vue JS.
import { createApp } from "vue";

createApp({
    components: {},
}).mount("#app");
- Head to
resources\jsand create a subfolder calledcomponentsand within that folder createDropdownComponent.vuefile. - Inside the file write Vue default setup and leave a 'hello world' for testing.
<template>
    <h1 class="text-red-500 text-bold">Hello world</h1>
</template>

<script>
export default {};
</script>

<style></style>
- Now it's time to create our route to this component.
- Head to
resources\jsand create a subfolder calledrouterand inside it createindex.jsfile. - Write the below code inside
index.jsfile. - In this code you're basically telling your project
Hi, I want to use Vue router and import this component whenever I'm in that path
import { createRouter, createWebHistory } from "vue-router";
import DropdownComponent from "../components/DropdownComponent";

const routes = [
    {
        path: "/",
        name: "home",
        component: DropdownComponent,
    },
];

export default createRouter({
    history: createWebHistory(),
    routes,
});
- Head back to
resources\js\app.jsand import your router and component. - End result below.
import { createApp } from "vue";
import router from "./router";
import DropdownComponent from "./components/DropdownComponent";

createApp({
    components: {
        DropdownComponent,
    },
})
    .use(router)
    .mount("#app");
- Open up the terminal and stop your
npm run watchif it's running and run it again to compile your files properly. - Now if you refresh you broswer you should see your hello world.
11- Build the Drop-down:
- Head back to
DropdownComponent.vueand within the template you can start building your Dropdown. - I create a container div which contains a button and a div. I want when I press on the button I can see list of links.
- I will add a
@clickto the button and conditionally show the div with links if some condition is true.
<template>
    <div>
        <button
            @click="showUsers"
            class="flex max-h-52 w-full overflow-auto py-2 pl-3 pr-9 text-sm font-semibold lg:inline-flex lg:w-32"
        >
            Users
        </button>
        <div
            v-show="usersToggle"
            class="mt-1 w-full rounded-xl bg-blue-100 py-2"
        >
            <a href="#" class="block mt-1 w-full rounded-xl bg-
                               blue-100 py-2">
                Testing
            </a>
        </div>
    </div>
</template>
- Now let's move to the script tags to import what we need and write down our logic using composition API.
- I will import ref and onMounted then create a usersToggle and set it to false and make the click on the button change it to true.
<script>
import { ref, onMounted } from "vue";
export default {
    name: "home",
    setup() {
        const usersToggle = ref(false);

        const showUsers = () => {
            usersToggle.value = !usersToggle.value;
        };

        return { showUsers, usersToggle };
    },
};
</script>
- Now if you check your browser, whenever you click on the button it will open a drop-down list with the testing links and if you click it again it will close.
12- Vue JS 3 click outside:
- Head to the following LINKand install npm click outside package for Vue3.
PS F:\Projects\dropdown-component> npm install --save click-outside-vue3 - Head to
app.jsand import itimport vClickOutside from "click-outside-vue3";and don't forget to addvClickOutsidejust next to use router.use(router, vClickOutside) - Head to
DropdownComponent.vueand import it within the script tagsimport vClickOutside from 'click-outside-vue3' - Add the directive as is says in the DOCs
    directives: {
        clickOutside: vClickOutside.directive,
    },
- Then in the setup make sure to create your function that will make the usersToggle false again by clicking outside and return it.
setup() {
        const usersToggle = ref(false);

        const showUsers = () => {
            usersToggle.value = !usersToggle.value;
        };

        const onClickOutside = (event) => {
            usersToggle.value = false;
        };

        return { showUsers, usersToggle, onClickOutside };
    },
- Within the template, add
v-click-outside="onClickOutside"to the container div. - Now if you test it on browser it works like a charm.
13- Loop over users in Database:
- Create a new route to receive your Json data from database.
Route::get('list', function () {
    return response()->json([
        'users' => \App\Models\User::all()
    ], Response::HTTP_OK);
});
- Head back to your component and adjust the anchor tag to loop over users array.
            <a
                href="#"
                class="block mt-1 w-full rounded-xl bg-blue-100
                       py-2"
                v-for="user in users"
                :key="user.id"
            >
                {{ user.name }}
            </a>
- In the setup, create empty array for users.
const users = ref([]);
- Then write the below code to say:
Hey! Get my Json data as a response from this path, and change the users array value to whatever data in the response.
Not only this, I want this data as soon as my component is mounted and return it to me.
        const getUsers = () => {
            axios.get("/list").then((response) => {
                users.value = response.data.users;
            });
        };

        onMounted(() => {
            getUsers();
        });

        return {
            showUsers,
            usersToggle,
            onClickOutside,
            getUsers,
            users,
        };
- Now, If you check your browser you will see your users names in a dynamic functional dropdown menu.
This is a final screen for my code in case you want to compare it to yours:
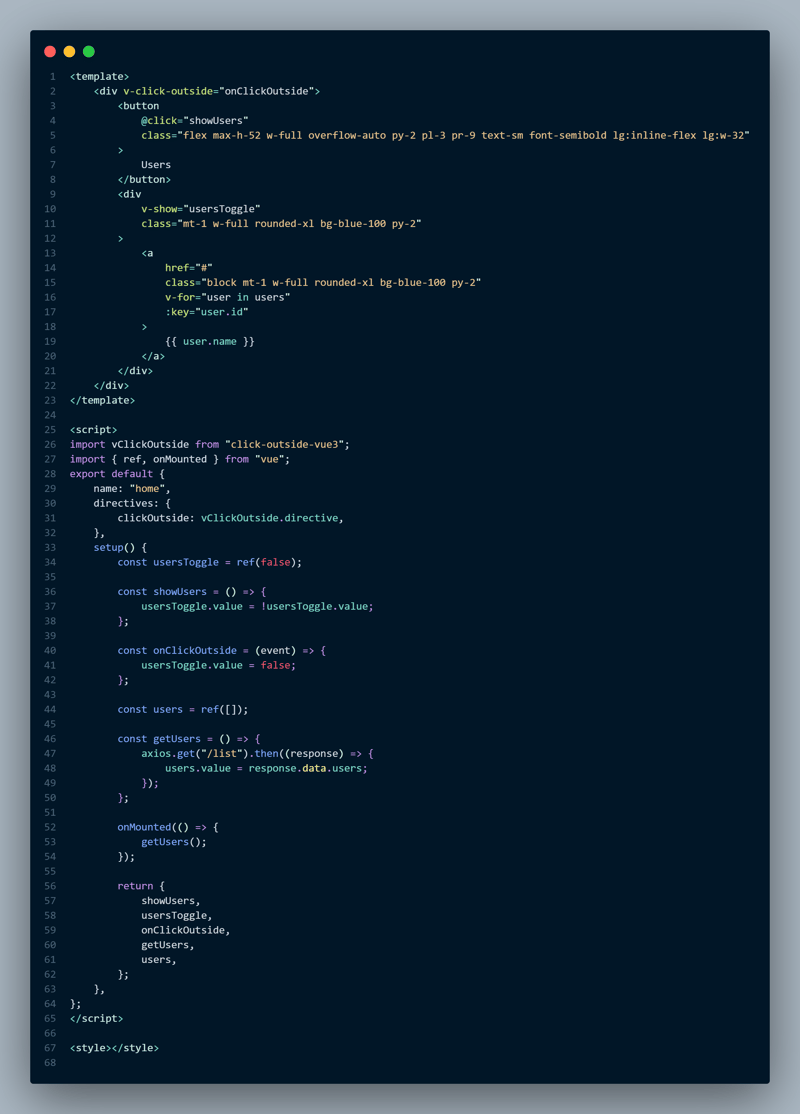
Also you can find full code on Github: https://github.com/MooseSaeed/dropdown-component
14- Finishing:
Congratulations you've created a complex Vue component with the latest release of everything 🎉🥳
Thank you so much for reading my article and I hope it was helpful for everyone.
If you have any questions, comments or feedback please leave them below or find me on Twitter and DMs are open.