The Internet is a global public resource that needs to be protected. Let’s start by securing the RESTful API where authenticated users can perform certain actions that unauthenticated users can’t.
This is the second part of the Learn PHP series. If you haven't checked Build a Simple REST API in PHP, I would highly recommend you to check that article first if you want to learn how to build a REST API in core PHP.
This guide walks you through to protect the PHP Rest API endpoints with Magic.
Why Magic?
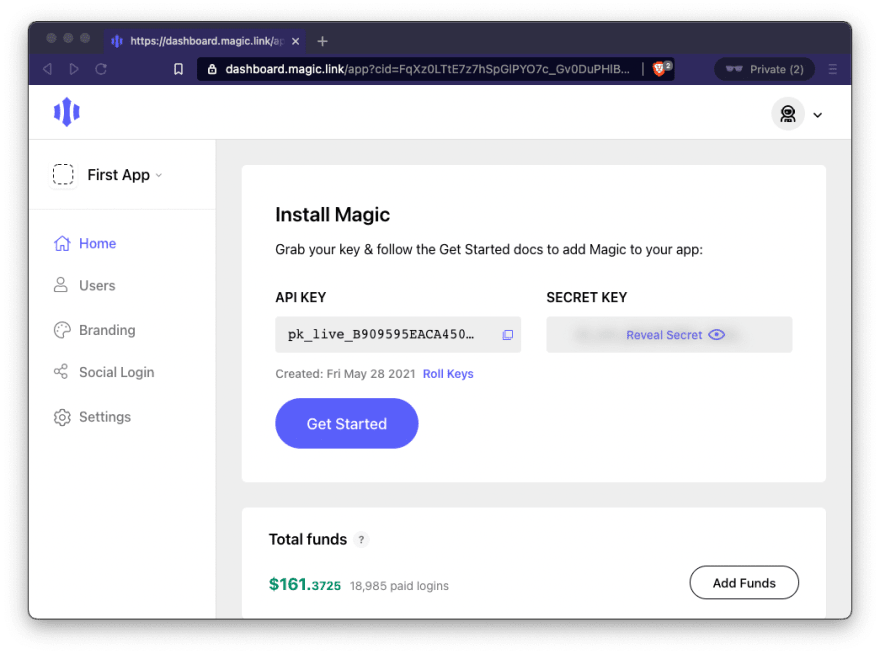
Magic enables you to ultra-secure your APIs with reliable passwordless logins, such as email magic links, social login, and WebAuthn, with just a few lines of code.
Clone the PHP Rest API if you are starting from here, but if you are following the Learn PHP series, you are good to go. You already have all the ingredients needed for a successful recipe. We will just add some Magic touches to it.
git clone https://github.com/shahbaz17/php-rest-api.git
cd php-rest-api
Configure the application
Create the database and user for the project.
mysql -u root -p
CREATEDATABASE blog CHARACTERSET utf8mb4 COLLATE utf8mb4_unicode_ci;
CREATEUSER'rest_api_user'@'localhost' identified by 'rest_api_password';GRANT ALL on blog.* to 'rest_api_user'@'localhost';
quit
Create the post table.
mysql -u rest_api_user -p;
// Enter your passworduse blog;
CREATETABLE `post` (
`id` int(11) NOTNULLAUTO_INCREMENT,
`title` varchar(255) NOTNULL,
`body` text NOTNULL,
`author` varchar(255),
`author_picture` varchar(255),
`created_at` datetime NOTNULLDEFAULTCURRENT_TIMESTAMP,
PRIMARYKEY (`id`)
);
mysql -u root -p
CREATE DATABASE blog CHARACTER SET utf8mb4 COLLATE utf8mb4_unicode_ci;
CREATE USER 'rest_api_user'@'localhost' identified by 'rest_api_password';
GRANT ALL on blog.* to 'rest_api_user'@'localhost';
quit
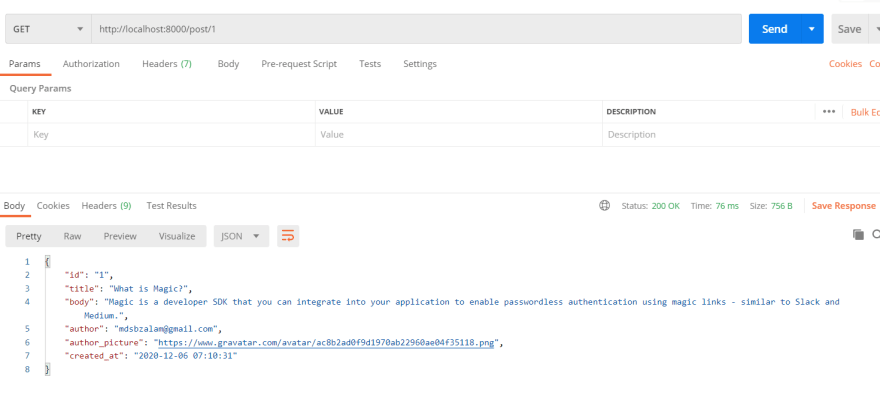
The REST API will contain posts for our Blog Application, with the following fields: id, title, body, author, author_picture, created_at. It allows users to post their blog on our Blog application.
Create the database table in MySQL.
mysql-urest_api_user-p;// Enter your passworduseblog;CREATETABLE`post`(`id`int(11)NOTNULLAUTO_INCREMENT,`title`varchar(255)NOTNULL,`body`textNOTNULL,`author`varchar(255),`author_picture`varchar(255),`created_at`datetimeNOTNULLDEFAULTCURRENT_TIMESTAMP,PRIMARYKEY(`id`));
Add the database connection variables to your .env file:
If you use Composer, these dependencies should be handled automatically. If you install manually, you'll want to make sure that these extensions are available.
This function is the starting point for our Magic Authentication, it instantiates Magic, validates the token, gets the issuer using the token, and retrieves the user's meta data using the issuer. It also retrieves the token from the HTTP Header.
publicfunctiongetEmail(){$did_token=\MagicAdmin\Util\Http::parse_authorization_header_value(getallheaders()['Authorization']);// DIDT is missing from the original HTTP request header. Returns 404: DID Missingif($did_token==null){return$this->didMissing();}$magic=new\MagicAdmin\Magic(getenv('MAGIC_SECRET_KEY'));try{$magic->token->validate($did_token);$issuer=$magic->token->get_issuer($did_token);$user_meta=$magic->user->get_metadata_by_issuer($issuer);return$user_meta->data->email;}catch(\MagicAdmin\Exception\DIDTokenException$e){// DIDT is malformed.return$this->didMissing();}}
Let me walk you through what this function is doing and how you can configure it for your application if you are not using PHP Rest API.
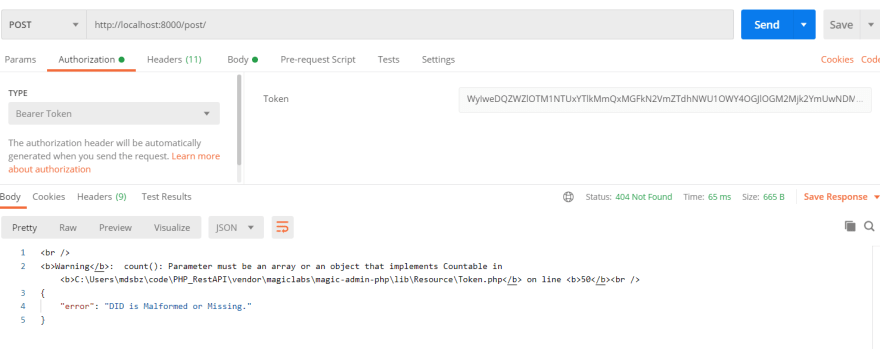
If DIDT is missing from the original HTTP request header. It returns 404: DID is Malformed or Missing.
didMissing()
privatefunctiondidMissing(){$response['status_code_header']='HTTP/1.1 404 Not Found';$response['body']=json_encode(['error'=>'DID is Malformed or Missing.']);return$response;}
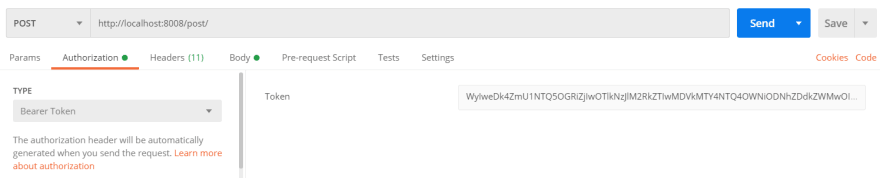
Validate DID Token <auth token>
The DID Token is generated by a Magic user on the client-side which is passed to your server via Frontend Application.
$magic->token->validate($did_token);
You should always validate the DID Token before proceeding further. It should return nothing if the DID Token is valid, or else it will throw a DIDTokenException if the given DID Token is invalid or malformed.
Get the issuer
$issuer=$magic->token->get_issuer($did_token);
get_issuer returns the Decentralized ID (iss) of the Magic user who generated the DID Token.
get_metadata_by_issuer retrieves information about the user by the supplied iss from the DID Token. This method is useful if you store the iss with your user data, which is recommended.
It returns a MagicResponse
The data field contains all of the user meta information.
issuer (str): The user's Decentralized ID.
email (str): The user's email address.
public_address (str): The authenticated user's public address (a.k.a.: public key). Currently, this value is associated with the Ethereum blockchain.
In this guide, we will be using email as the author in the post table.
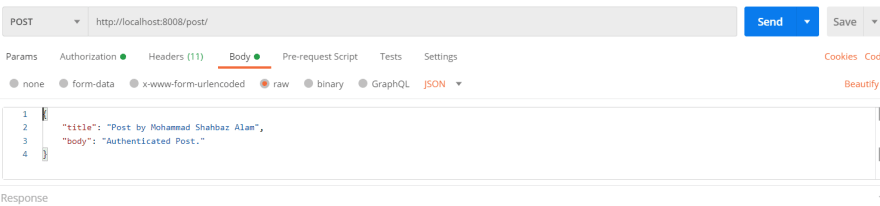
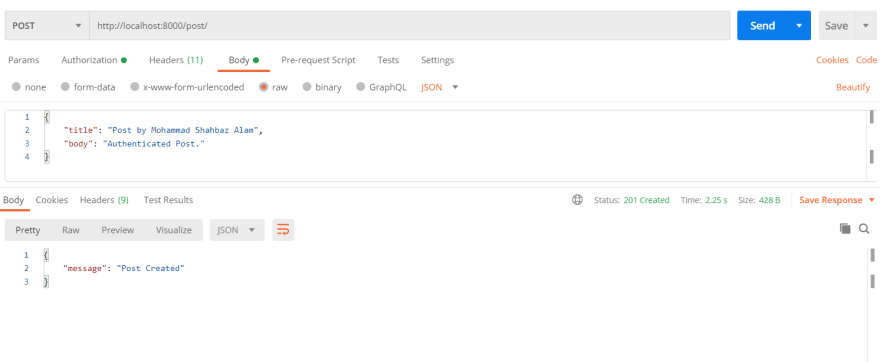
Update createPost()
This will be the protected route, so let's add Magic to it. It means only the authenticated persons can create a post, where it will use their email as the author field of the post.
It returns the email id of the authenticated user.
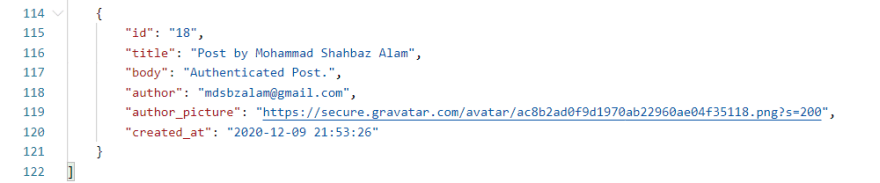
Author's email and picture
Let's use the email address of the authenticated user to be used as the author of the post and use the email to get the public profile picture set with Gravatar.
This route will also be protected, which means the only person who should be able to update the post is the person who wrote it.
privatefunctionupdatePost($id){$result=$this->find($id);if(!$result){return$this->notFoundResponse();}$input=(array)json_decode(file_get_contents('php://input'),TRUE);if(!$this->validatePost($input)){return$this->unprocessableEntityResponse();}$author=$this->getEmail();$query="
UPDATE posts
SET
title = :title,
body = :body,
author = :author,
author_picture = :author_picture
WHERE id = :id AND author = :author;
";if(is_string($author)){try{$statement=$this->db->prepare($query);$statement->execute(array('id'=>(int)$id,'title'=>$input['title'],'body'=>$input['body'],'author'=>$author,'author_picture'=>'https://secure.gravatar.com/avatar/'.md5(strtolower($author)).'.png?s=200',));if($statement->rowCount()==0){// Different Author trying to update.return$this->unauthUpdate();return$response;}}catch(\PDOException$e){exit($e->getMessage());}$response['status_code_header']='HTTP/1.1 200 OK';$response['body']=json_encode(array('message'=>'Post Updated!'));return$response;}else{return$this->didMissing();return$response;}}
Protect unauthorize update
$query="
UPDATE posts
SET
title = :title,
body = :body,
author = :author,
author_picture = :author_picture
WHERE id = :id AND author = :author;
";
unauthUpdate()
return$this->unauthUpdate();...// unauthUpdate()privatefunctionunauthUpdate(){$response['status_code_header']='HTTP/1.1 404 Not Found';$response['body']=json_encode(['error'=>'You are not authorised to delete this post.']);return$response;}
Update deletePost($id)
This route will also be protected, which means the only person who should be able to delete the post is the person who wrote it.
privatefunctiondeletePost($id){$author=$this->getEmail();if(is_string($author)){$result=$this->find($id);if(!$result){return$this->notFoundResponse();}$query="
DELETE FROM posts
WHERE id = :id AND author = :author;
";try{$statement=$this->db->prepare($query);$statement->execute(array('id'=>$id,'author'=>$author));if($statement->rowCount()==0){// Different Author trying to delete.return$this->unauthDelete();return$response;}}catch(\PDOException$e){exit($e->getMessage());}$response['status_code_header']='HTTP/1.1 200 OK';$response['body']=json_encode(array('message'=>'Post Deleted!'));return$response;}else{// DID Error.return$this->didMissing();return$response;}}
Protect unauthorize delete
$query="
DELETE FROM posts
WHERE id = :id AND author = :author;
";
unauthDelete()
return$this->unauthDelete();...// unauthDelete()privatefunctionunauthDelete(){$response['status_code_header']='HTTP/1.1 404 Not Found';$response['body']=json_encode(['error'=>'You are not authorised to delete this post.']);return$response;}
$ git clone https://github.com/shahbaz17/magic-didtoken
$ cd magic-didtoken
$ cp .env.example .env
# enter your Magic API keys in your .env file
$ yarn install
$ yarn dev
# starts app at http://localhost:3000
git clone https://github.com/shahbaz17/magic-php-rest-api.git
cd magic-php-rest-api
Configure the application
Create the database and user for the project.
mysql -u root -p
CREATEDATABASE blog CHARACTERSET utf8mb4 COLLATE utf8mb4_unicode_ci;
CREATEUSER'rest_api_user'@'localhost' identified by 'rest_api_password';GRANT ALL on blog.* to 'rest_api_user'@'localhost';
quit
Now, as you have secured your PHP REST API with Magic. Let's deploy it on Heroku and show the world how awesome REST API you have built which is protected with the best Authentication Layer provided by Magic with just a few lines of modification to a core PHP application.
In my next article, I will cover how you can deploy your REST API application to Heroku.


 Medium